
Professional landscape plant drip irrigation installation in Phoenix Az
Comprehensive Guide to Outdoor Landscape Plant Drip Irrigation system Installation with Pressure Vacuum Breaker, Valve, and Timer
Ensuring Efficient, Automated, and Safe Watering for Your Garden
Introduction
In modern landscaping, efficient water management is essential not only for the health of your plants but also for the conservation of water resources. Drip irrigation systems stand out as one of the most effective methods for delivering water directly to the root zones of plants, reducing wastage and promoting lusher, more sustainable landscapes. Installing a drip irrigation system for your outdoor plants, complete with a new pressure vacuum breaker, automated valve, and timer, elevates your landscape’s functionality to a new level of convenience, safety, and efficiency.
This guide will provide a detailed, step-by-step explanation of how to install a comprehensive drip irrigation system, from understanding the components and benefits to executing the installation and troubleshooting common issues. Whether you are a homeowner, avid gardener, or landscaping professional, following this guide will ensure that your plants thrive with minimal manual intervention.
Benefits of Drip Irrigation Systems
• Water Efficiency: Drip irrigation minimizes evaporation and runoff, delivering water directly to the root zone where it’s needed most.
• Healthier Plants: Consistent watering reduces plant stress and helps avoid diseases associated with overhead watering, such as leaf mold or mildew.
• Weed Reduction: By targeting water delivery, drip systems discourage weeds, as areas between plants remain dry.
• Time Savings: Automated systems controlled by timers reduce the need for manual watering routines.
• Flexibility and Scalability: Drip irrigation can be adapted to landscapes of various sizes and modified as your planting schemes evolve.
• Cost Savings: Lower water bills can be realized over time due to reduced consumption and increased system efficiency.
Key Components of the System
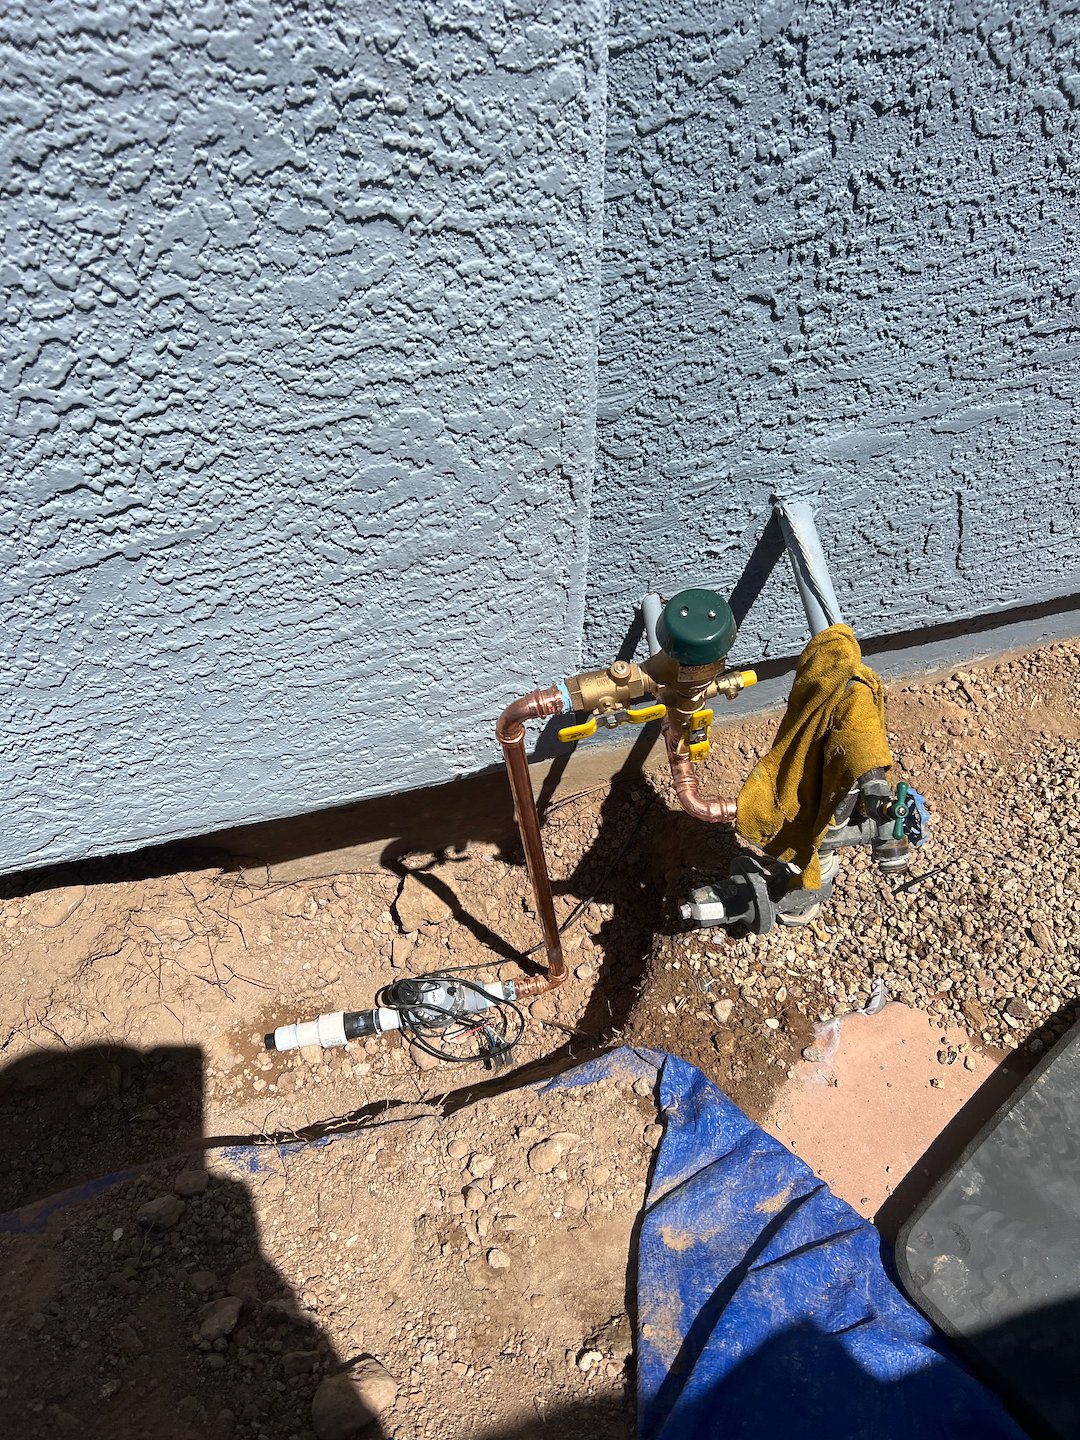
• Pressure Vacuum Breaker (PVB): Prevents backflow of contaminated water into your main supply, essential for protecting potable water sources. Installation is often required by local plumbing codes.
• Control Valve: Regulates the flow of water to the irrigation system. Automated valves allow for remote or scheduled control.
• Timer (Irrigation Controller): Enables precise scheduling of irrigation cycles, optimizing water use according to plant needs and climate conditions.
• Pressure Regulator: Ensures water is delivered at the optimal pressure for drip irrigation (typically 15–30 psi), preventing damage to the drip emitters.
• Distribution Tubing and Drip Lines: Mainlines and lateral lines carry water throughout the landscape, with emitters delivering water at preset rates directly to plants.
• Fittings & Connectors: Used for branching, extending, and connecting lines; include tees, elbows, couplers, and end caps.
Planning Your Drip Irrigation Layout
• Assess Your Landscape: Map out planting beds, note plant types, and consider sun exposure, soil type, and slope.
• Water Source Location: Determine proximity to outdoor faucets or main lines for ease of connection.
• Zone Creation: Divide your landscape into zones based on plant water needs, sun exposure, and microclimates.
• Emitter Sizing: Calculate the number and flow rate of emitters per plant, ensuring adequate coverage without overwatering.
• Budget and Materials: Create a shopping list of all components, accounting for spare parts and future expansion.
Step-by-Step Installation Instructions
1. Install the Pressure Vacuum Breaker
• Turn off the main water supply before beginning any installation.
• Install the PVB above the highest point in the irrigation system (typically 12 inches above the highest emitter), following local plumbing codes.
• Ensure all connections are secure and watertight, using Teflon tape where necessary.
• Test for leaks after installation by briefly turning the water back on.
2. Attach the Control Valve
• Connect the valve downstream of the PVB, ensuring it is accessible for maintenance and operation.
• If installing an automatic valve, connect it to the irrigation controller (timer) as per manufacturer instructions.
3. Install the Timer (Irrigation Controller)
• Mount the timer near the water source or indoors (for Wi-Fi/Bluetooth models), following the manufacturer’s guidelines.
• Set up the wiring for automatic valves, and program basic schedules tailored to your plantings and local climate.
4. Add Pressure Regulator
• Install a pressure regulator to reduce and stabilize water pressure suitable for drip lines.
5. Lay Out and Connect Tubing
• Use mainline tubing to run from the pressure regulator to the various zones.
• Branch off with lateral tubing as per your layout.
• Use connectors and fittings to navigate corners, tees, or end points.
6. Install Drip Emitters
• Punch holes in lateral tubing using a drip tool and insert emitters according to plant placement and water requirements.
• Use inline drip tubing for row planting or individual emitters for shrubs and trees.
7. Secure and Test the System
• Turn the water supply back on and test each zone, checking for leaks, proper pressure, and emitter operation.
• Adjust emitter placement or flow rates as needed for uniform coverage.
Programming and Maintenance
• Timer Scheduling: Set watering intervals based on season, rainfall, and plant needs. Early morning or late evening watering minimizes evaporation.
• Seasonal Adjustments: Modify schedules during wet or dry spells and pause during freezing temperatures to prevent damage.
• Regular Inspection: inspect emitters for clogs or leaks.
• Winterization: In cold climates, drain and blow out irrigation lines before the first freeze, and remove or insulate backflow devices and timers.
Troubleshooting Common Issues
• Clogged Emitters: Regularly check and clean emitters to ensure consistent flow.
• Low Pressure: Verify that the pressure regulator is working and that there are no leaks or kinks in the tubing.
• Inconsistent Coverage: Reassess emitter placement and make sure all connections are secure.
• Timer Malfunctions: Check battery life or power supply, and reprogram if necessary after outages.
• Backflow Concerns: Routinely inspect the pressure vacuum breaker for signs of failure or leaks.
Safety and Compliance Considerations
• Always check and adhere to local plumbing codes regarding the installation of backflow prevention devices.
• Use only certified and approved components to ensure system reliability and protect potable water supplies.
• Keep manuals and installation guides for reference and future maintenance.
Conclusion
A properly installed drip irrigation system with a pressure vacuum breaker, control valve, and timer will provide years of reliable service, safeguarding your landscape investment and conserving water. While the installation may seem complex, careful planning and systematic execution turn it into a manageable project for any dedicated homeowner or professional.
By embracing this approach, you not only create an efficient watering system but also contribute to the broader goals of environmental stewardship and resource conservation, leaving your landscape both vibrant and sustainable for years to come.
Location: Phoenix, AZ
Project Image Gallery
